Wednesday 13 April 2011

Possible fix for torn SP1 machines

Update 16/05/2011 - There's now a supported fix for machines in this state.

Edit 05/05/2011 - Having run this on all of my machines, I can't see anything to show that they're not now fully working. Also, setting the permissions (the long winded stage 4) doesn't seem to be necessary.

Yesterday I came up with a possible fix for getting SP1 correctly installed on a torn machine. I posted a very brief overview of what I'd done over on The Windows Servicing Guy's blog. Here are a more in-depth set of steps and instructions for those who are interested.

Part 1 - Ascertaining if you've got the same problem I did

  1. On a torn PC try to install SP1 from the the full file available at http://www.microsoft.com/downloads/en/details.aspx?FamilyID=c3202ce6-4056-4059-8a1b-3a9b77cdfdda
  2. When it fails, check the log at %windir%\Logs\CBS\CBS.log. If you've got the same error I have on all of my torn machines you should see something similar to this towards the end of the log:

Part 2 - Get the missing folder
  1. Get hold of your original Windows 7 Installation media.
  2. Download 7zip and install.
  3. In 7zip file manager navigate to the sources folder on your installation media and double click install.wim. 7zip will expand the wim file.
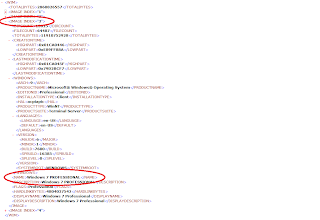
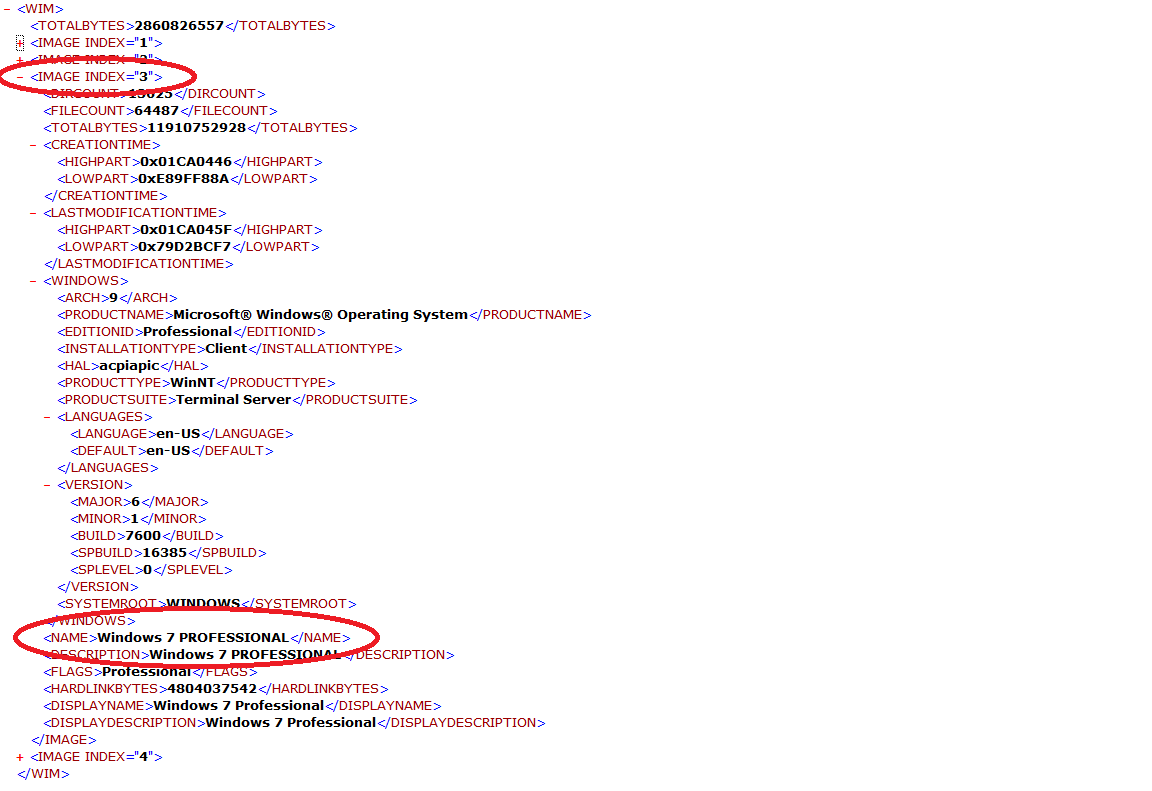
  4. You'll now see a few folders and an xml file. The xml file will tell you which folder you need for your version of windows. In my case folder 3 is Windows 7 Pro
  5. Browse to the FileRepository folder in the appropriate image and copy out the missing folder to a usb drive. In my case this would be the atiilhag.inf_amd64_neutral_951c1812f542740a folder in D:\sources\install.wim\3\Windows\System32\DriverStore\FileRepository\. I made sure that the ati folder was in its own sub folder on the usb drive as I'm lazy and it made it easier copying it in the next part.
Part 3 - Get the missing folder back in place
  1. Boot from your Windows 7 media into recovery console.
  2. Plug in your USB drive.
  3. Ascertain the drive letters you're gong to be working with. (If you're a GUI person you can always launch notepad.exe from the command prompt to look at drive letters).
  4. From the command prompt use xcopy to put the atiilhag.inf_amd64_neutral_951c1812f542740a folder back into the FileRepository folder. As an example, I executed the following commands:

    d:
    cd \windows\system32\driverstore\filerepository
    f:
    cd \atidriver
    xcopy *.* /e d:
     
  5. exit and restart into windows.
Part 4 - Set the permissions


(Long winded. If anyone would like to send me a shorter way to achieve this, please do!)
  1. Browse to %windir%\System32\DriverStore\FileRepository
  2. Open the properties for the atiilhag.inf_amd64_neutral_951c1812f542740a folder.
  3. On the security tab click Advanced, then Owner then the Edit button.
  4. Change the owner to Administrators, check "Replace Owner on subcontainers & objects".
  5. Click OK 3 times.
  6. (Back in the Security tab now) Click Edit then Add.
  7. Change the location to your local PC.
  8. Type the following into the "Enter object names to select" box: Administrators; Users; NT SERVICE\TrustedInstaller
  9. Click OK then give TrustedInstaller Full Control.
  10. Click OK and then Yes.
  11. Click Advanced and then Change permissions.
  12. Uncheck "Include inheritable permissions..." then click the Add button.
  13. Remove permissions for the Everyone group. Click OK and then Yes.
  14. Back on the Owner Tab click Edit then click Other users and groups.
  15. Change the location to the local PC, Enter NT SERVICE\TrustedInstaller into the "Enter object names to select" box and click OK.
  16. Check "Replace Owner on subcontainers..." and click OK

    Phew! That's the Files in the folder all now set with the right permissions. Nearly there...
  17. Click Edit again.
  18. Change the owner to Administrators and click OK and OK again (NOTE: do NOT appy to subcontainers!)
  19. On the Permissions tab click Change Permissions.
  20. Check "Include Inheritable..." and then click Apply and Yes followed by Continue 19 times (as it can't and shouldn't apply to any of the files)
  21. Remove all of the "<not inherited>" permissions, Click OK, Yes and then Continue 19 times again.
  22. Back on the Owner tab click Edit and then Other users or Groups.
  23. Click Location, change it to the Local PC and click OK.
  24. Enter SYSTEM in the "Enter object names to select" box and then click OK 5 times until all properties windows are closed.
Part 5 - Remove the partially installed Service Pack

  1. Launch an administrative command prompt (Right-click on Command Prompt in the Start Menu and click "Run as Administrator")
  2. At the prompt type dism /online /remove-package /packagename:Package_for_KB976932~31bf3856ad264e35~amd64~~6.1.1.17514
  3. Hit enter.
  4. After a while you'll be prompted to reboot. Type Y to do so.
Part 6 - Install Service Pack 1

  1. Launch the SP install from the file you downloaded back in Part 1. With a bit of luck, all should be well.
That's it it's worked on every machine I've tried it on so far. Fingers crossed it helps you too!

Thursday 7 April 2011

Procrastination is the mother of invention

So, I've basically avoided rebuilding any more PCs as yet. My official excuse is that I'm waiting for MS to come up with a fix. The more honest one is that it's a boring and long process and I'd rather work on other things. So I've been spec'ing and ordering the start of this year's hardware refresh which in turn has led me to completely rebuild my MDT/WDS server to include SP1.

It's been an interesting couple of days. Getting the MDT server up and running was as simple as ever and it's always good to see what changes have been made by the latest service packs (in my case I'm now running MDT 2010 on Server 2008 R2 SP1). There were a couple of frustrations though that I thought I'd document.

Our new laptops are Toshiba Portege R700-183 boxes. They have, of course, got a few drivers that Windows doesn't pick up and so I've been working on getting the software installed silently. The first problem I hit was with installing the Bluetooth stack. If you download the Bluetooth driver from Toshiba and extract the executable using something like 7zip, you get two batch files for silent install. Unfortunately silent_install_for_Vista_Win7.bat is badly written imo. Some lines don't account for spaces in the file path whilst others do and there's a user reboot prompt at the end of the file. So how is that silent exactly? I've pasted my amended file below. Anyway, once I'd amended the bat file and added it as an application that took care of the BlueTooth. The same process applied to the FingerPrint utility but the silent install for that one actually works out of the box.

Anyway the second problem was probably more down to me rather than anything else. I always like to have the latest drivers if I'm doing a fresh build so, wherever possible, I'll use the drivers from Windows Update rather than embedding them into MDT. I'd noticed that the video, wireless and 'intel management engine interface' drivers were all available from Windows Update along with the Toshiba HDD Protection Shock Sensor Driver, which doesn't show up as unknown hardware in Device Manager but I'll take it anyway thanks! So... I wanted to use these, but of course they're not all available via my WSUS server. The sensible solution seemed to me to create a prestage OU with Group Policy inheritance blocked, find out how to put a computer into the prestage OU when deploying via MDT and move it to the live OU at the end.

Luckily for me it's a pretty simple process thanks to the incredible development work that's gone on over at the MDT Customization Project on Codeplex. I won't replicate their work here but if you're interested in achieving the same thing I have, take a look at Maik Koster's blog post on Moving Computers in Active Directory During MDT Deployments - Step by Step. It's incredibly simple and the web service works like a dream.

So I've now got a lovely clean new image for deploying Windows 7 SP1 to any new computers. At some point next week I'll test it out on the older machines I have in case I need it for a rebulid. It'll probably need a few extra drivers but now that I've got the Windows Update step of the MDT Task Sequence pointing at Microsoft instead of my WSUS server, I'm hoping that it won't be that many.

silent_install_for_Vista_Win7.bat :

@echo off
echo Execute this script as Administrator (right mouse click on the bat-file and select "Run as administrator")
echo Silent Bluetooth stack installation in progress.
echo Please wait until it is finished.
echo ****************************************************************************

REM Removing old BT-Stack ... if installed
msiexec.exe /x"{CEBB6BFB-D708-4F99-A633-BC2600E01EF6}" /qn

REM enable AS.ini for silent installation

IF EXIST "%~dp0x64\Program Files\Toshiba\Bluetooth Toshiba Stack\AS.orig.ini" GOTO FCOPY
move "%~dp0x64\Program Files\Toshiba\Bluetooth Toshiba Stack\AS.ini" "%~dp0x64\Program Files\Toshiba\Bluetooth Toshiba Stack\AS.orig.ini"
:FCOPY
echo Copy as.silent.ini to as.ini
copy "%~dp0as.silent.ini" "%~dp0x64\Program Files\Toshiba\Bluetooth Toshiba Stack\AS.ini"


REM Removing BTmon ... if installed
REM echo Try to remove BTmon if installed
REM "C:\Program Files (x86)\InstallShield Installation Information\{61539202-097E-487E-9237-B291AB56D54C}\setup.exe" -runfromtemp -l0x0009 -removeonly


REM Installing new BT-Stack ... in silent mode
"%~dp0x64\setup.exe" /s /v"/qn REBOOT=ReallySuppress ALLUSERS=1"

REM Restore original AS.ini
del "%~dp0x64\Program Files\Toshiba\Bluetooth Toshiba Stack\AS.ini" /F /Q /S
move "%~dp0x64\Program Files\Toshiba\Bluetooth Toshiba Stack\AS.orig.ini" "%~dp0x64\Program Files\Toshiba\Bluetooth Toshiba Stack\AS.ini"


echo ****************************************************************************
echo Suppress Wireless Warning window
echo.
REG.exe ADD "HKEY_CURRENT_USER\Software\Toshiba\WirelessAPL\BTWLANDP" /v DisplayFlag /t REG_DWORD /d 1 /f
echo ****************************************************************************
echo Disable SystemWakeup
echo.
REG.exe ADD "HKEY_LOCAL_MACHINE\SYSTEM\CurrentControlSet\Services\Tosrfusb\Parameters" /v EnableSystemWakeup /t REG_DWORD /d 0 /f
echo ****************************************************************************


echo ###### INSTALLATION FINISHED SUCCESSFULLY #########

:start
REM Following line added to make it properly silent
goto no
REM echo "Reboot now? [Yes/No]"
REM choice /C:YN
REM if ERRORLEVEL 2 goto no
REM if ERRORLEVEL 1 goto yes
REM goto start

REM :yes
REM echo Your system will reboot in a few seconds !!!
REM shutdown -r -f -t 18

:no
exit